You may get this error under the following circumstances:
The ERR_CACHE_MISS error code is often seen by developers who want to test the webpage with incorrect code. A user is about to submit a filled form
There could be multiple reasons why this error appears. The most common reasons include:
A bug or error in one of the installed extensions A particular browser setting A corrupted browser Missing cache files related to the page that you are trying to load in the browser The webpage that you are trying to load has some errors in its code or has some PHP issues that are unresolved Network issues on your device
This error message is mostly encountered by Chrome users. However, a small percentage of Firefox users have also witnessed it, although the message reads differently on it.
7 Methods to Fix ‘ERR_CACHE_MISS’ in Google Chrome
The ERR_CACHE_MISS error can be really frustrating. Maybe you were trying to submit some important online form, and you keep getting this error. Fortunately, there are some easy fixes for this error. Here are 7 methods to help you get rid of ERR_CACHE_MISS:
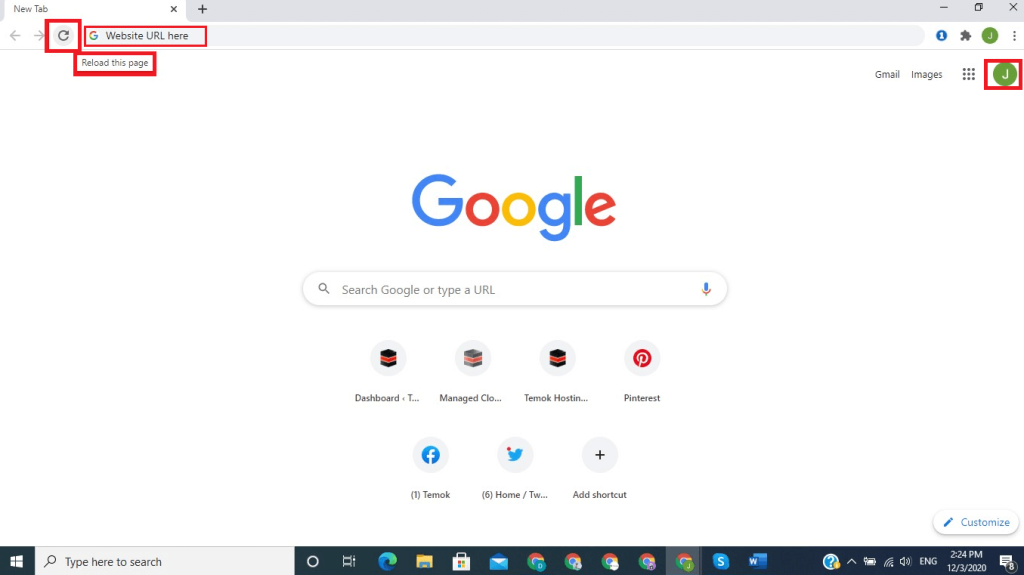
1. Reload the Page
More often than not, network connectivity issues can be the cause of this error. The quickest solution in this case is to reload the page. There are two ways to reload the page in Google Chrome:
Press the reload button to the left of the address bar of the browser. Press F5 from your keyboard
In case the ERR_CACHE_MISS error persists, then we should conclude that the network connectivity isn’t the root cause to begin with.
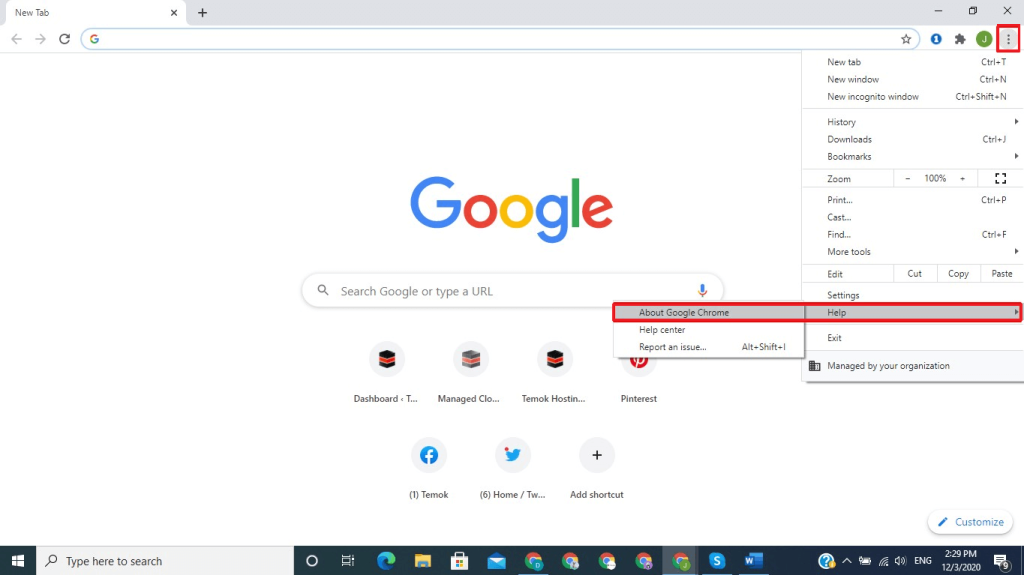
2. Update Your Browser
Google keeps on pushing updates to Chrome every now and then. These updates may address some bugs, security issues, or inefficiencies present in the browser. If you have not updated Chrome for some time, then it might be possible that the version you are using has become outdated and incompatible. It would be wise to update Chrome to the latest version and check if it resolves the issue.
Follow the steps given below to update Chrome:
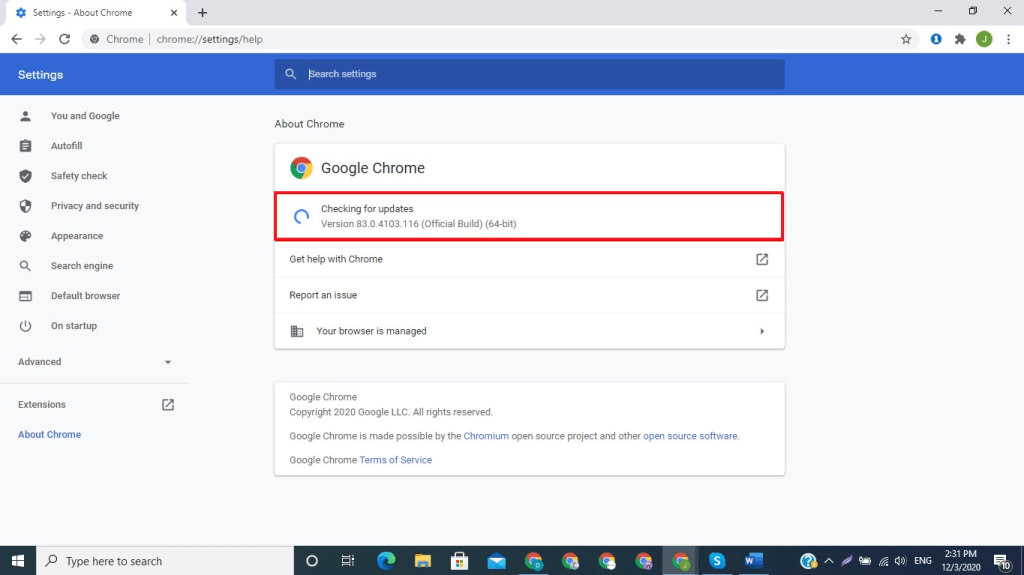
Open a new Chrome window Go to Settings from the three-dot menu in the upper right corner In the Settings tab, look for About Chrome in the left pane. Click on it. Chrome will display the current version and will automatically check for newer stable versions. If found, you will be notified. Simply click on Update Chrome in that case.
3. Clear Your Browser Data
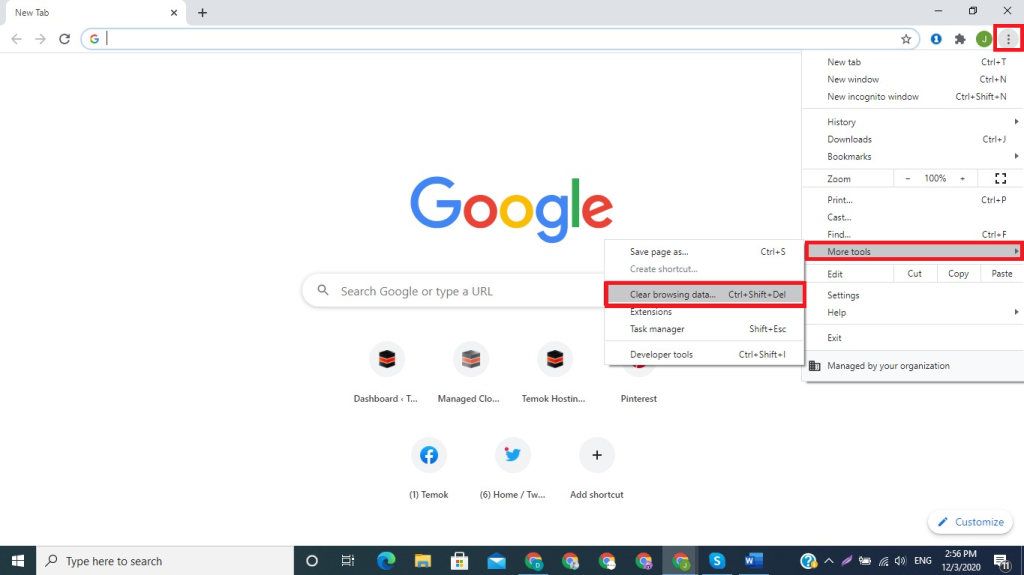
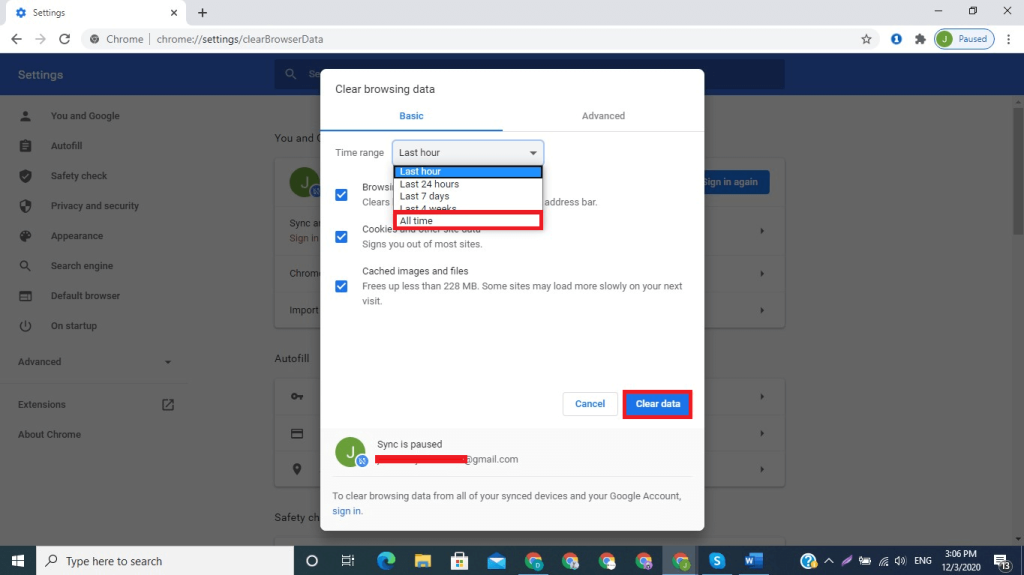
Since the error is related to caching, it would make sense to clear any Browser data. This is because Browser Data contains cache files for any web pages that you have visited in the past. It may have so happened that the cache files have become corrupt, leading to this error. Cache files only serve to speed up websites by storing static data locally. Therefore, there is no need to worry while deleting them as cache will build up again. To clear your browser history, follow the steps given below:
Hit the three-dot menu at the top right corner. Hover your mouse over More Tools in the drop-down menu. In the sub-menu, tap Clear Browsing Data.
A pop-up window appears with three options – Browsing History, Cookies and other side data, and Cached images and files. Check all the three boxes and hit on Clear Data.
Refresh the browser using either reload or the F5 button to see if the error is resolved.
4. Disable Your Browser Extensions
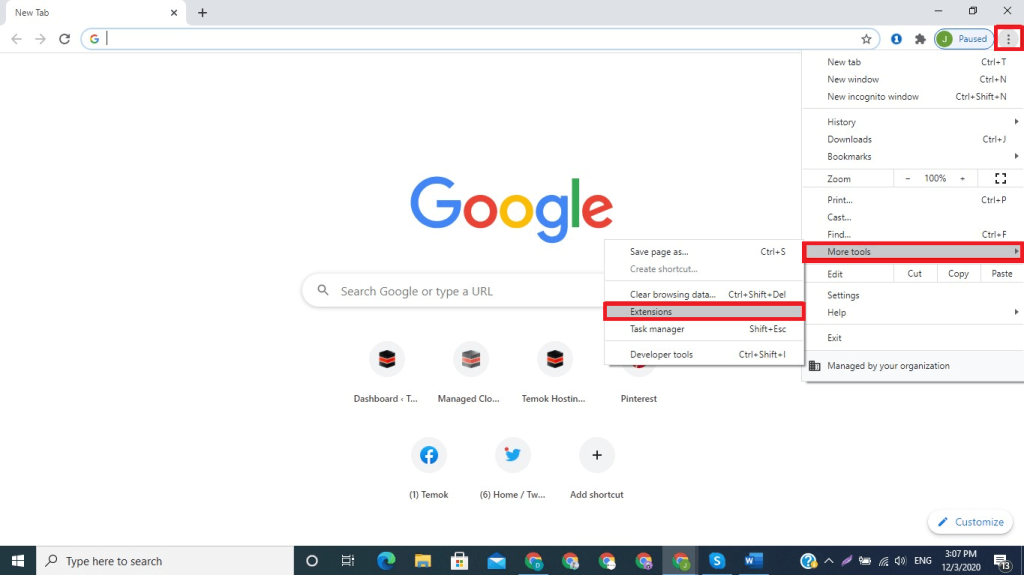
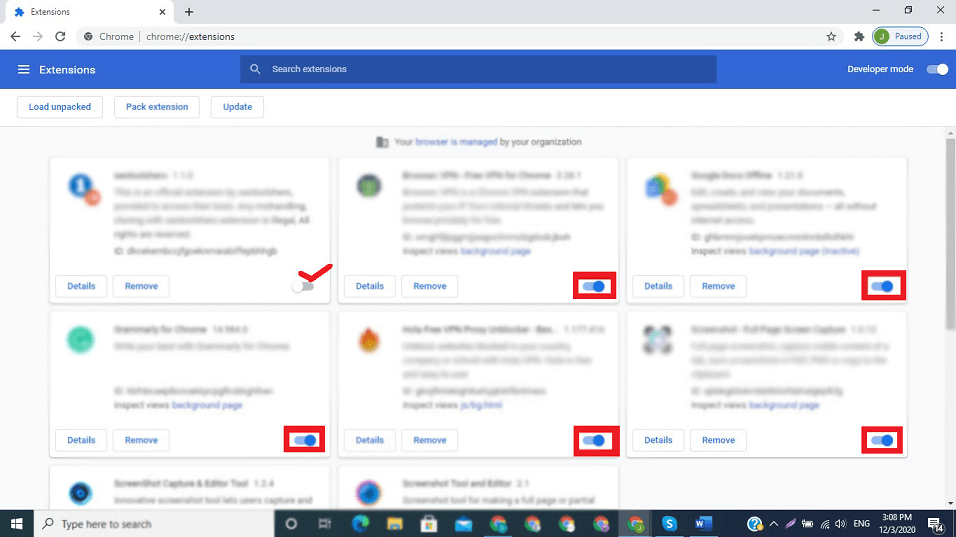
Browser extensions are kind of like third-party apps. They may get corrupted or might no longer be compatible with the version of Chrome that you are using. In such cases, the code for the extension may conflict with the Browser’s code. The quickest possible solution in this scenario is to disable all your extensions to see if it fixes the problem. You could also disable one at a time to check for the culprit. Perform the following steps to achieve this:
From the three-dot menu, go to More Tools. Look for Extensions on the sub-menu and click on it.
Now you should land on the Extensions. Disable each extension one by one and refresh the webpage to see if it fixes the error. You should start by Ad Blocker extensions as they are often the cause of such issues.
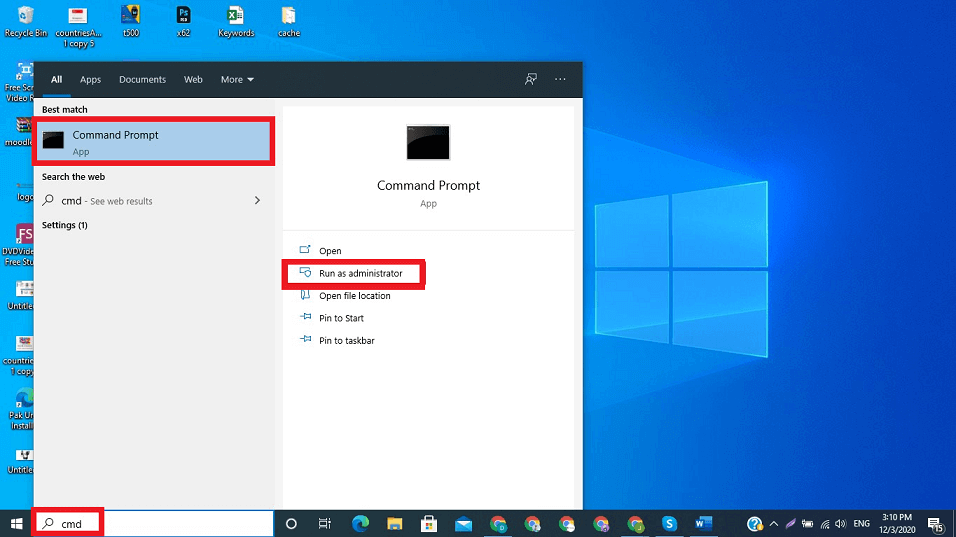
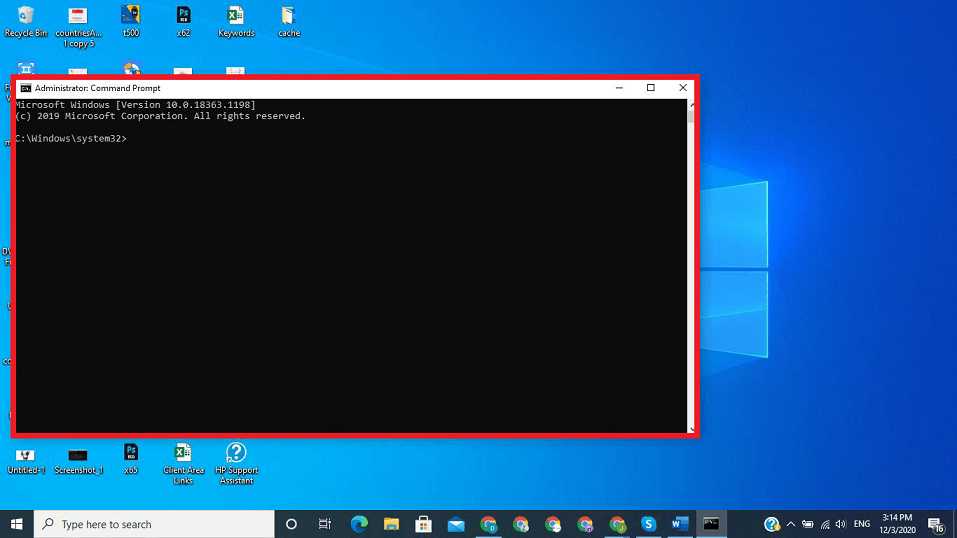
5. Reset Your Network Settings
The next option is to reset your network settings. You can do this by launching the command prompt in administrator mode from the start window. In the command prompt, type the sequence of commands given below and tap enter after every command to execute it:
ipconfig/release ipconfig/all ipconfig/flushdns ipconfig/renew netsh int ip set dns netsh winsock reset ipconfig renew ipconfig renew
In case you are using a MAC, you can do the following:
Go to Finder Select Applications in the left pane In the Applications window, look for Utilities and tap it. Launch the terminal from the Utilities window. Type dscacheutil –flushcache and press enter Type sudo killall -HUP mDNSResponder and press enter
After you have completed the above mentioned processes on your PC or MAC, simply restart it for the changes to take effect. Launch Chrome again and try to load the page, and check if the problem persists.
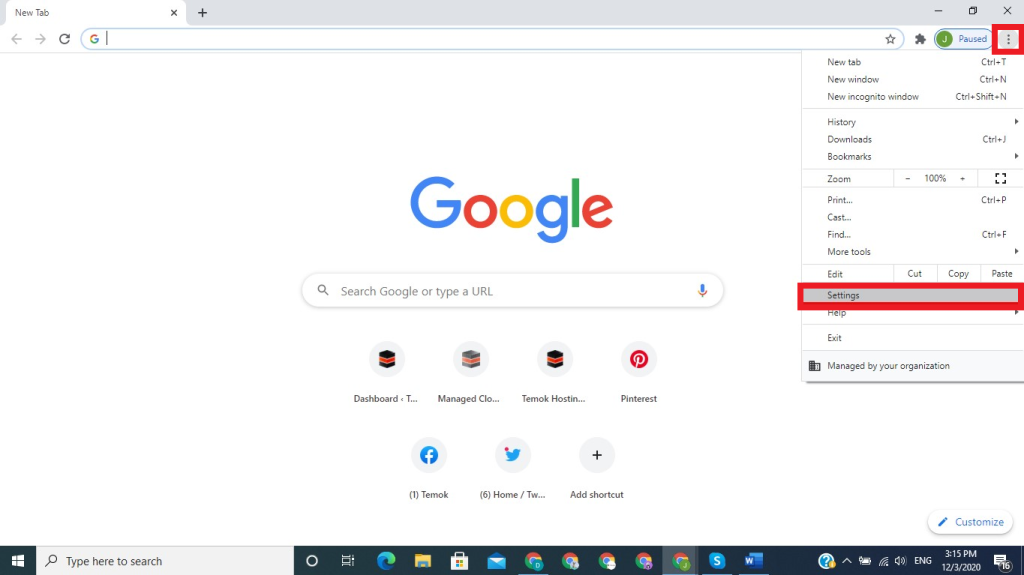
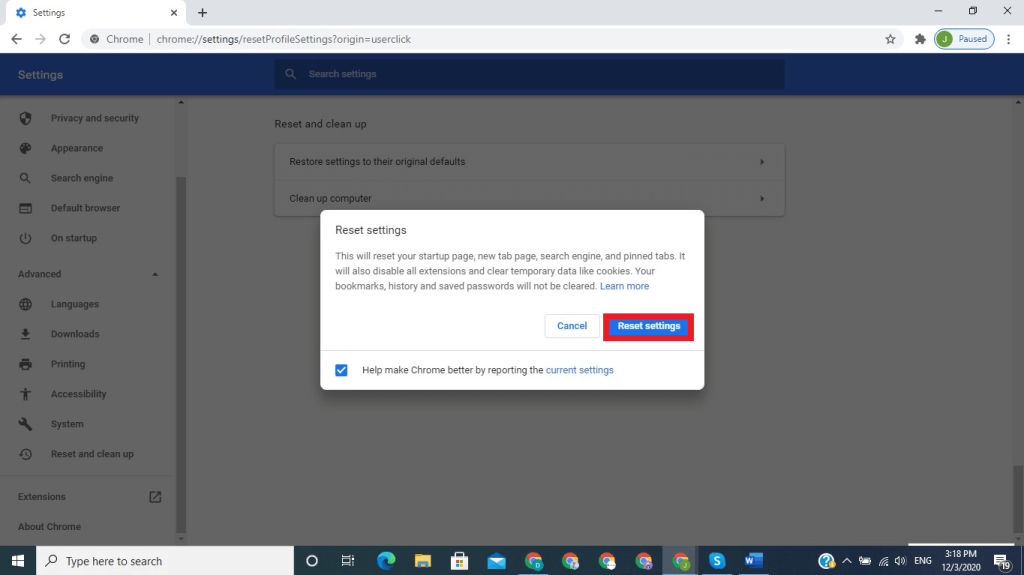
6. Reset Your Browser Settings
Sometimes your browser settings may require a reset. In such cases, you need to follow the steps given below:
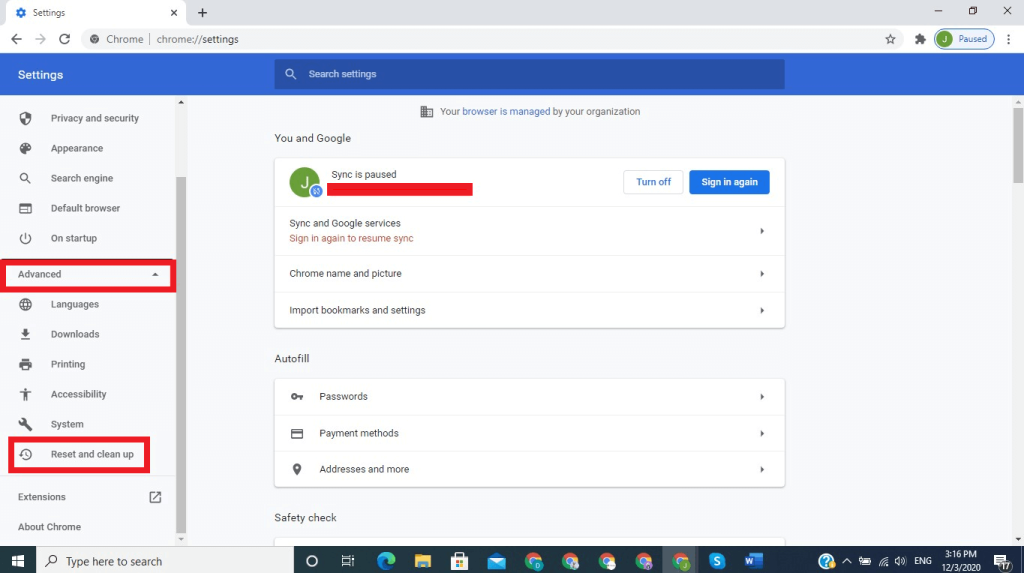
Go to Settings and then to
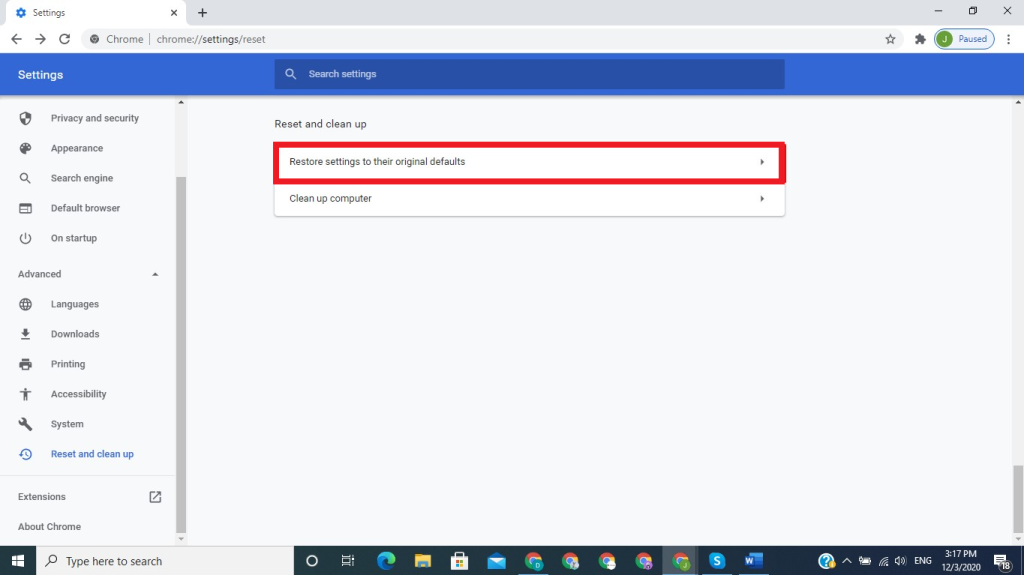
Expand the advanced menu to access an option called Reset Settings. Click on it to reset your browser’s settings to default.
An alternate way to reset the browser settings is by typing the following in the address bar and pressing enter:
chrome://settings/resetProfileSettings
After you have reset your browser settings, you need to restart the browser and check on the webpage again.
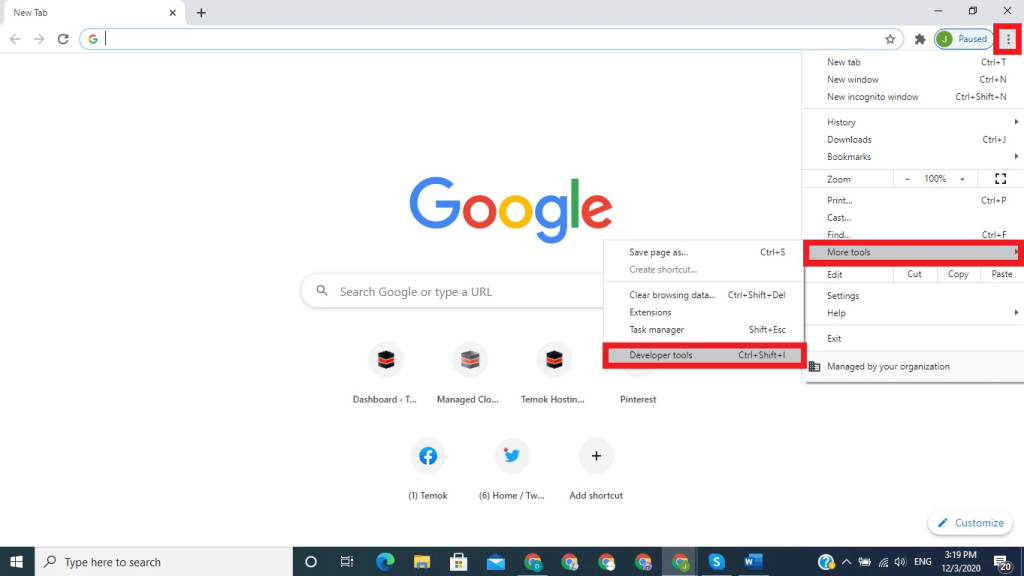
7. Cache System Disable
If all else fails, then the final option would be to totally disable the cache system of your browser. You can do this by accessing the Developer’s tools provided by Chrome. Perform the steps listed below:
Hit the three-dot menu at the top Hover your mouse over the More tools option, and a sub-menu will appear. In the sub-menu, tap Developer’s Tools.
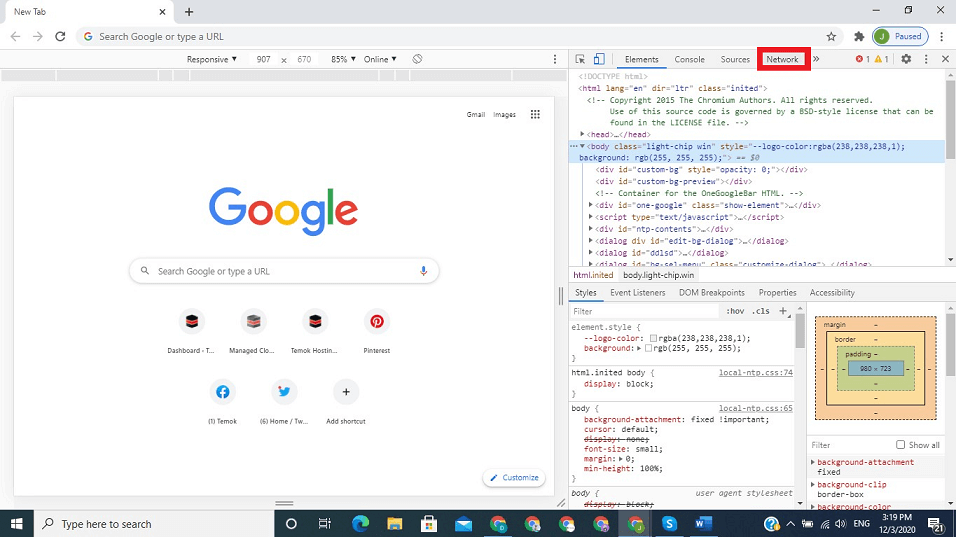
A window expands on the right side of the bowser. In the toolbar menu of this sub-window, look for Network and click on it.
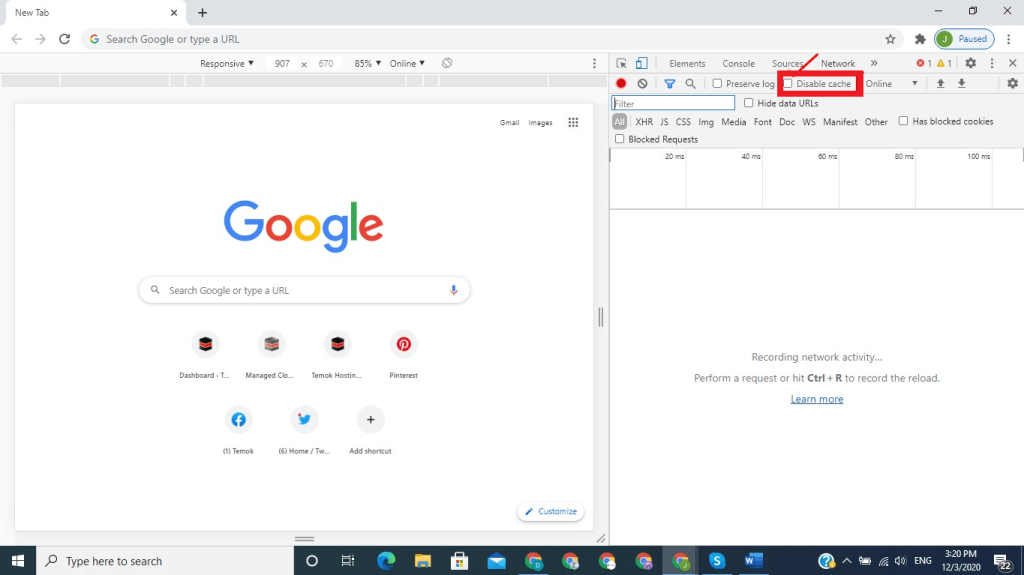
Underneath the toolbar, you should see an option called Disable Cache. Tap it to turn off Caching.
This should fix the issue for good, and you should no longer see the error code.
Conclusion
Since there are multiple reasons behind the ERR_CACHE_MISS error, you should start with the most convenient methods. Try out each method one by one. Sometimes there may be more than one cause, and multiple methods will be needed to resolve the issue. Needless to say, while performing any of the above steps, ensure that you have a stable internet connection. Otherwise, it would be really difficult to pinpoint the cause. Comment * Name * Email * Website
Δ
![]()
![]()
![]()
![]()
![]()

