Download and Install Keil uVision MDK
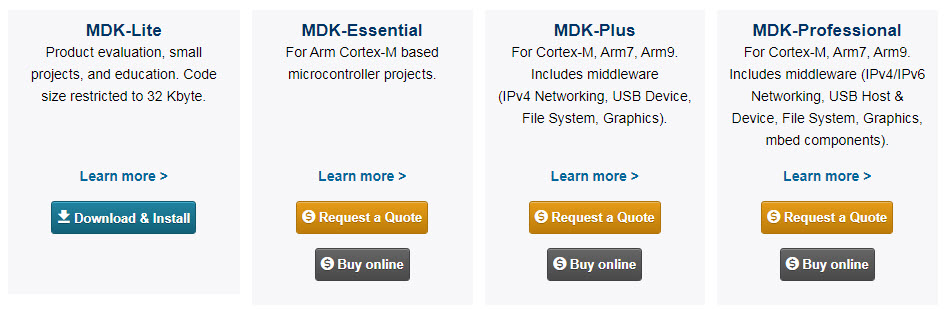
Let us begin this tutorial by downloading the Keil MDK for LPC1768 MCU. The Keil MDK, which is short for Microcontroller Development Kit, is a software development environment for ARM Cortex-M based Microcontrollers. The Keil MDK consists of the uVision IDE (Integrated Development Environment), Arm C/C++ Compiler, Debugger and some middleware components. In addition to these core components, the Keil MDK supports Software Packs, which are device specific files like Startup Code, Device HAL (Libraries), CMSIS Libraries (ARM Specific Libraries), standard board support files, middleware (like USB, Networking, Graphics etc.), code templates and example projects. I will talk about the Software Packs for LPC1768 in the next section. In this section, let us proceed with Downloading and Installing Keil MDK for LPC1768 MCU. Before downloading Keil MDK, you have to know that there are four different versions of MDK. They are:
MDK-Lite MDK-Essential MDK-Plus MDK-Professional
Except MDK-Lite, all other editions come at a price, which, if you are interested, have to purchase the licence from Keil’s official website. MDK-Lite is a free, evaluation edition that is code restricted to 32KB. But for our beginner tutorials in LPC1768, this version is more than sufficient.
In order to download the Keil MDK-Lite version, you have to fill up a form with your contact information like name, e-mail address, company, country etc. Use this link to fill up the details and once you submit the form, a link for downloading MDK will be available. At the time of developing this tutorial series, MDK529 was the latest version. Download the executable, which is approximately 835 MB in size. After downloading the Keil MDK, install it. It is a fairly simple process and you just have to follow the on-screen instructions. After successful installation, a desktop shortcut will be created. Double-click on this shortcut to launch the Keil uVision Application. We can now proceed to install the Software Packs.
Software Packs for LPC1768 MCU
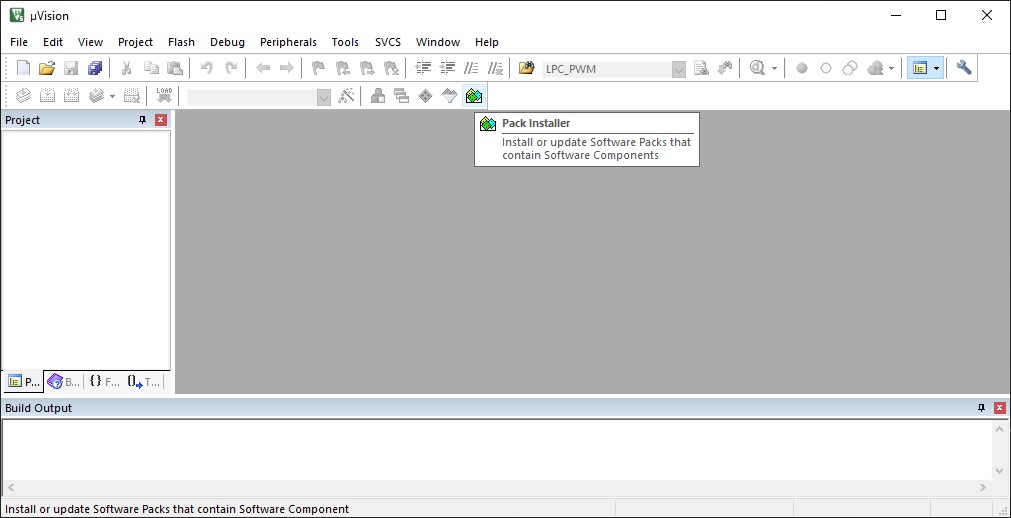
Once the Keil is up and running, you can launch the software pack installer either by navigating through Project -> Manage -> Pack Installer… or you can use the shortcut in the Build Toolbar.
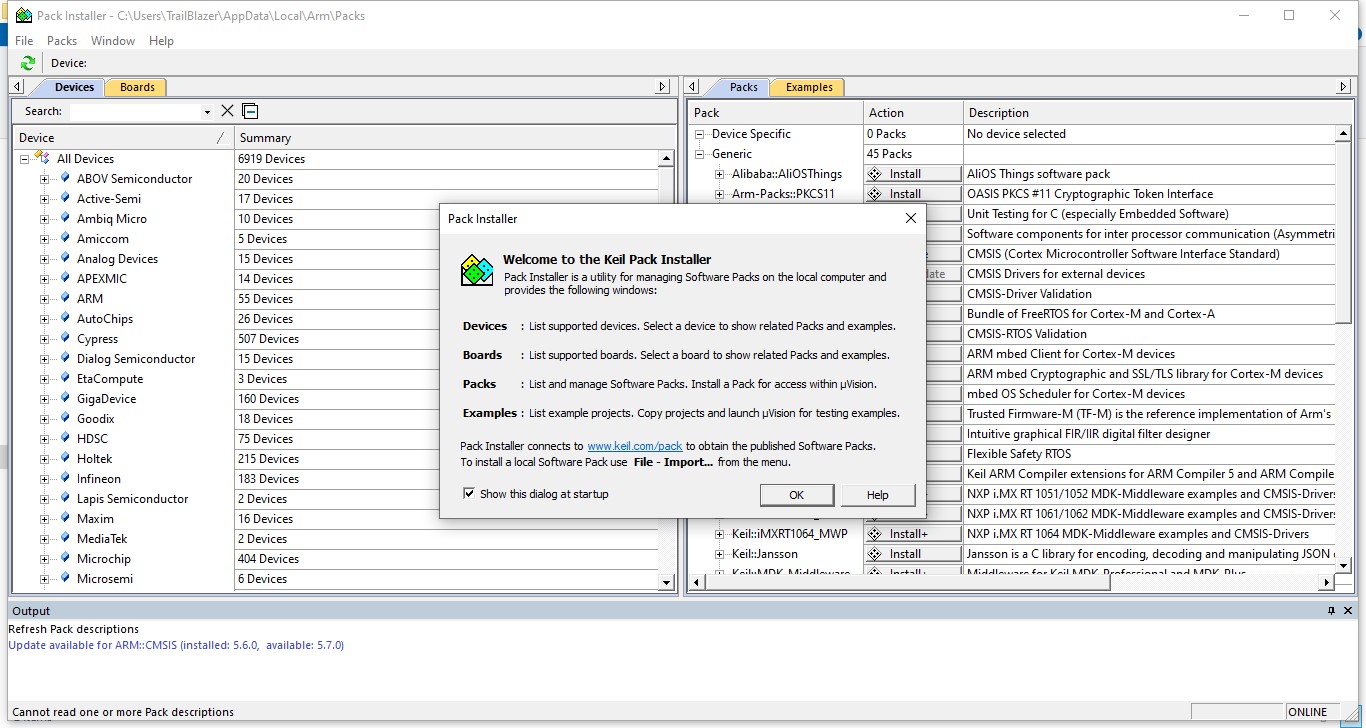
A new window will open with a start-up dialog displaying the details about each tab in the Keil Pack Installer Utility. The Pack Installer Utility is divided into two halves. On the left side, there are device selection tabs called “Devices” and “Boards”. On the right side, there are device specific files called “Packs” and “Examples”.
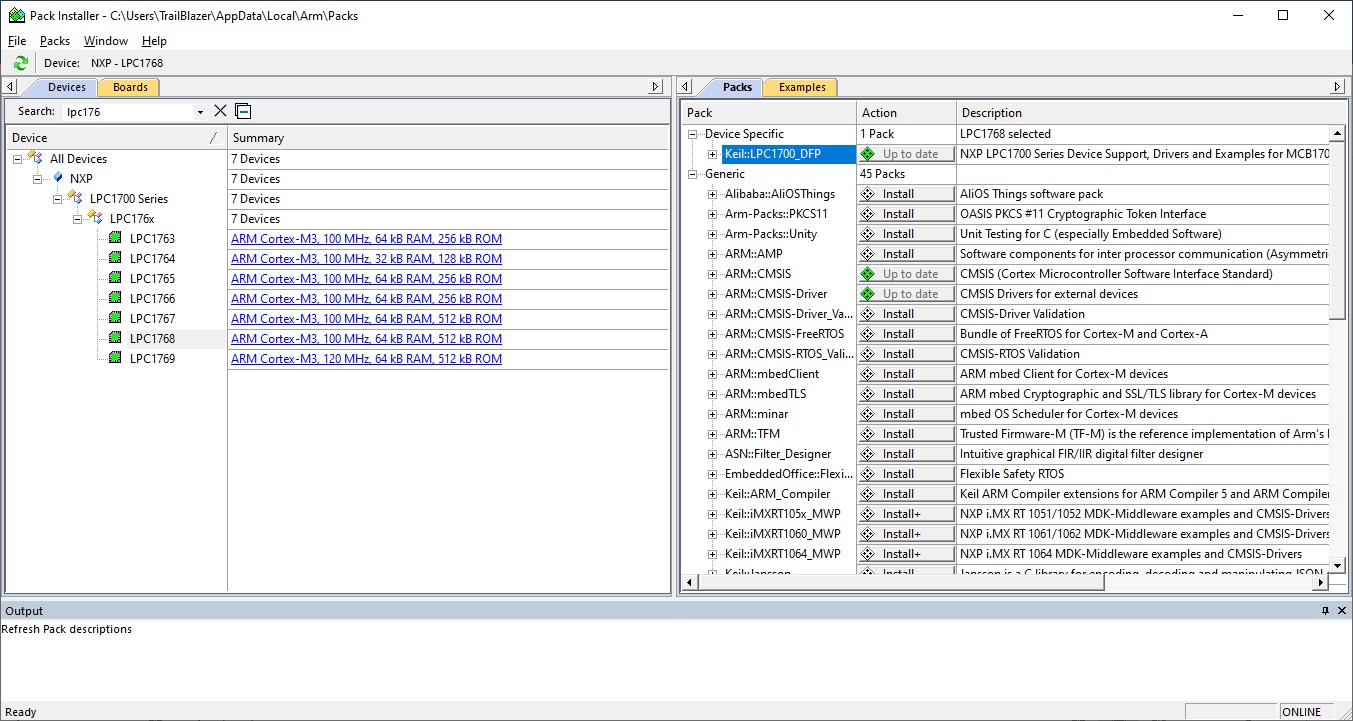
In the Devices tab, you can search for LPC1768 and select the device. Then, as per your selection, the Packs section will be updated with list of compatible software packs. On the top of the Packs tab, there is a Device Specific Pack for LPC1700 Series of Microcontrollers (this includes LPC1763, LPC1764, LPC1765, LPC1766, LPC1767, LPC1768 and LPC1769). Select the Keil::LPC1700_DFP and click on install.
Additionally, you have to download the ARM CMSIS and ARM CMSIS-Driver packs. Your computer must have internet access as the software packs are downloaded from the internet. After successful installation and updates (if any), you can close the Pack Installer Utility and the Keil uVision will prompt that the software packs have been modified. Click on Yes to reload the packs.
Creating a New LPC1768 Project in Keil
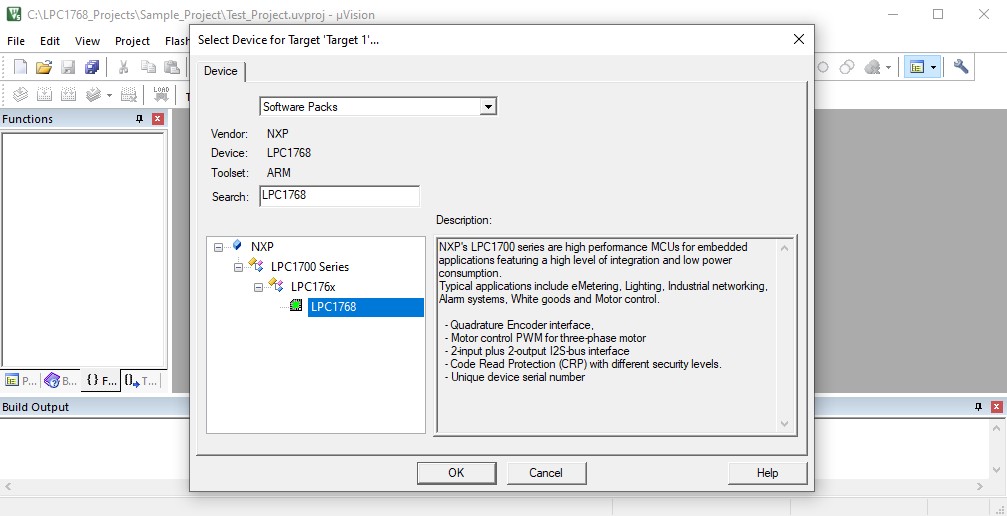
In Keil IDE, click on Project and New uVision Project. Select a suitable location and provide a name for your project. I have given it as “Test_Project”. Then Keil MDK will ask you to select the device for your project. You can search for “LPC1768” and select the device and click on OK.
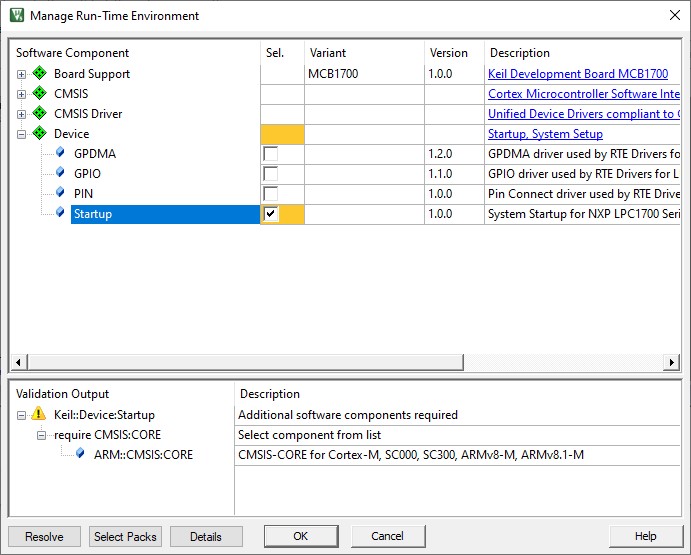
Now, a new window opens asking us to select the run-time environments. Expand “Device” option and check the “Startup” option. The moment you check the Startup option, it will warn you that you need to add some additional software components and will list out the required software packs. In this case, it needs the ARM CMSIS-CORE Component, which is present in the CMSIS Section.
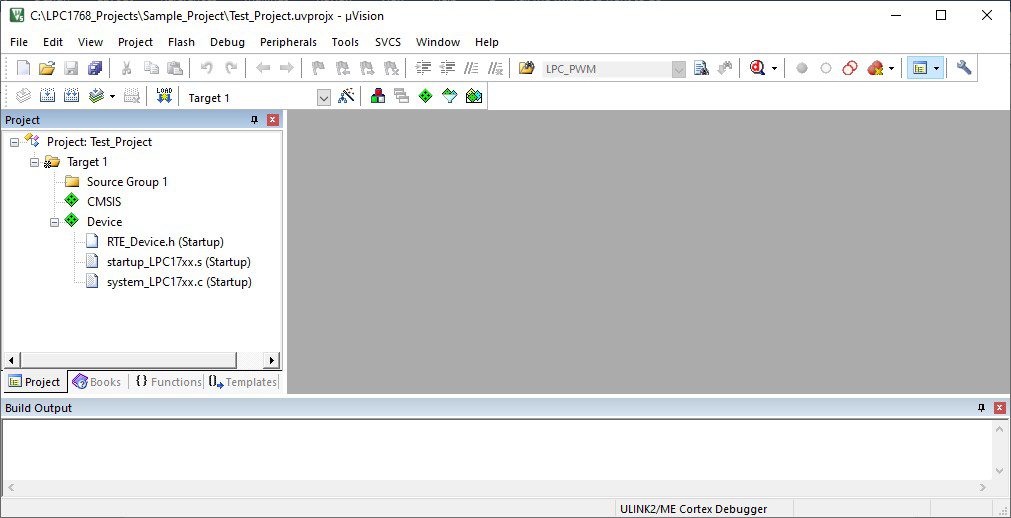
You can either select the “Resolve” option on the bottom left, or you can manually add the necessary component. After adding the CMSIS Core, click on OK and you will get to the main project window in Keil MDK uVision. On the left side, there is a project window, which displays all the project related files.
Target Options
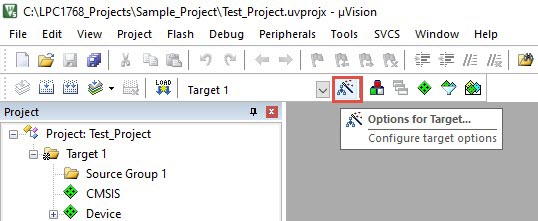
Now, before proceeding with writing our application i.e. the main.c file, you need to modify some settings for the target device. Use the shortcut “Options for Target…” in the Build Toolbar.
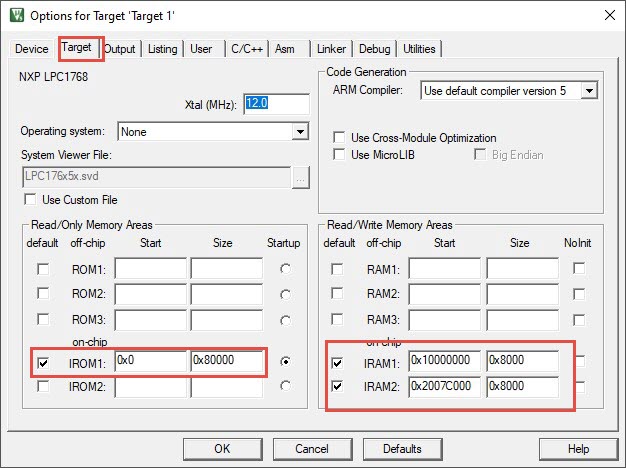
A new window will appear called “Options for Target ‘Target1’”. In the “Target” tab, make sure that RAM and ROM starting addresses and sizes match the following.
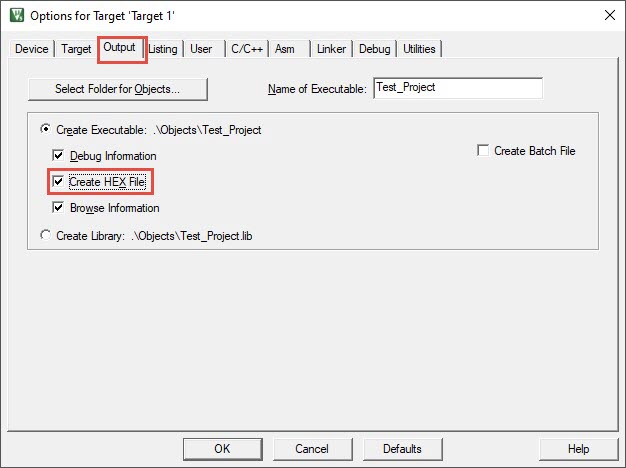
Go to the “Output” tab and check the “Create HEX File” option. This will make the Keil IDE to generate the HEX file when we build our project, which we can use to program our LPC1768 MCU using Flash Magic Tool.
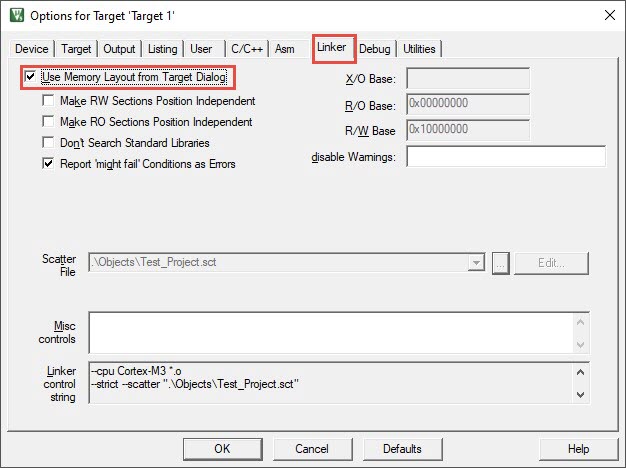
Now, go to the “Linker” tab and check the “Use Memory Layout from Target Dialog” option.
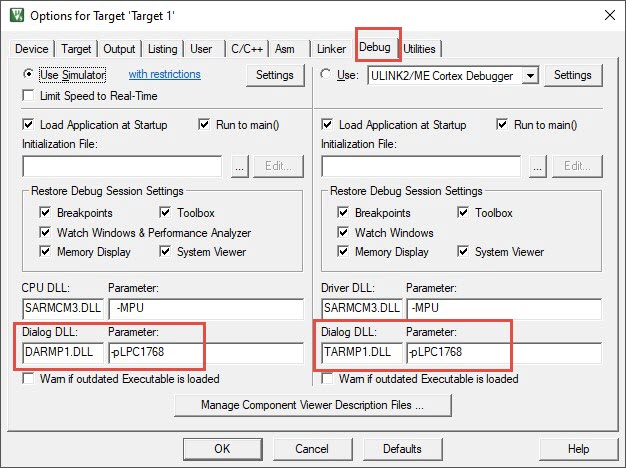
Finally, in the “Debug” tab, select “Use Simulator” option and modify the Dialog DLL and Parameter options as shown in the image below.
This completes the basic setup of Keil MDK for LPC1768 MCU.
Creating main.c File
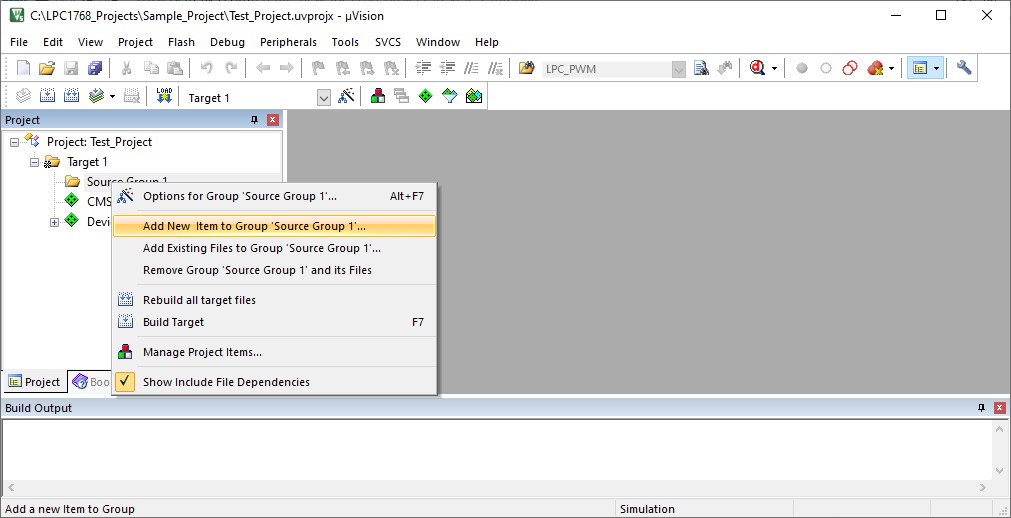
After saving the target options, right click on “Source Group 1” and select “Add New Item to Group ‘Source Group 1’”.
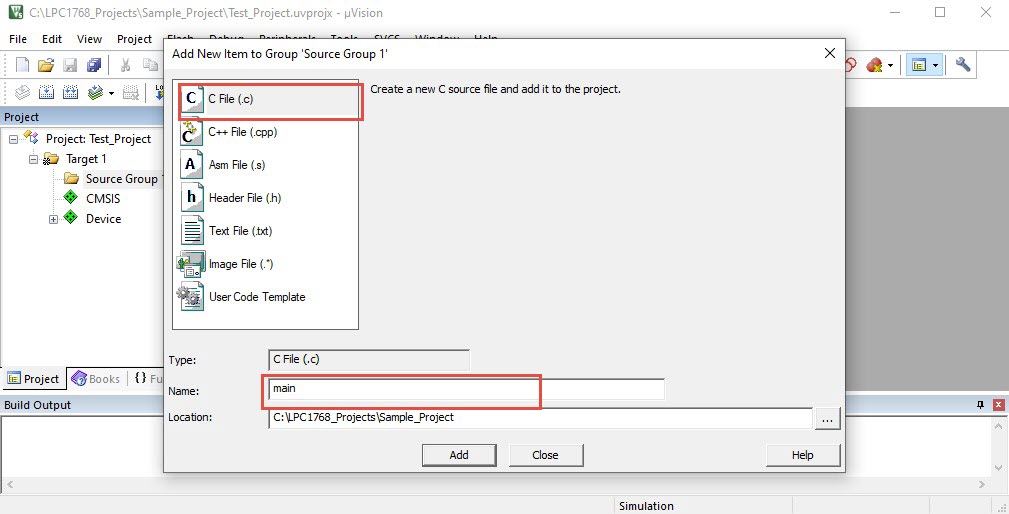
A new window will open for adding the source file. Select the type of file as C File (.c) and give the name as main and click on Add.
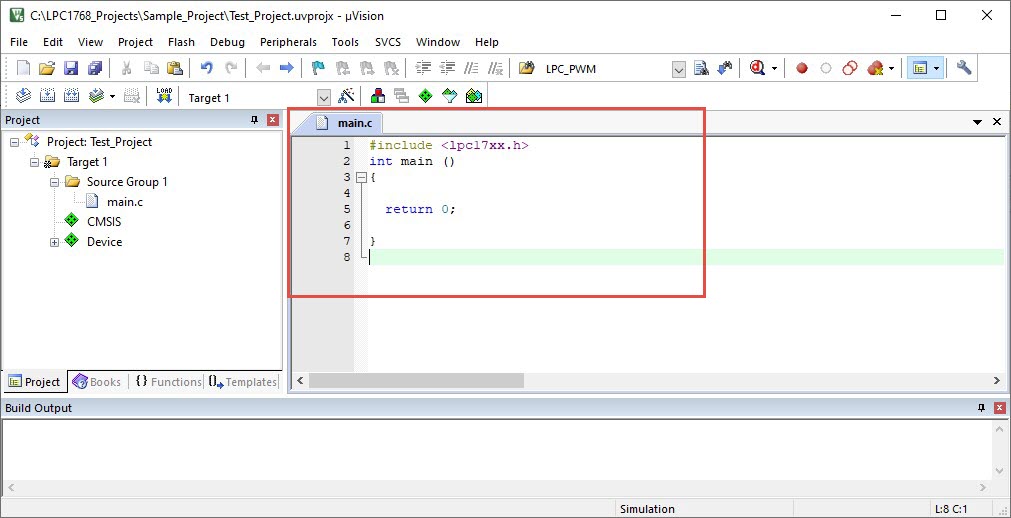
In the main.c file, add a sample code which includes the LPC1768’s header file i.e. lpc17xx.h and a main function. This is just to test that all the files are properly working and also to generate the HEX file.
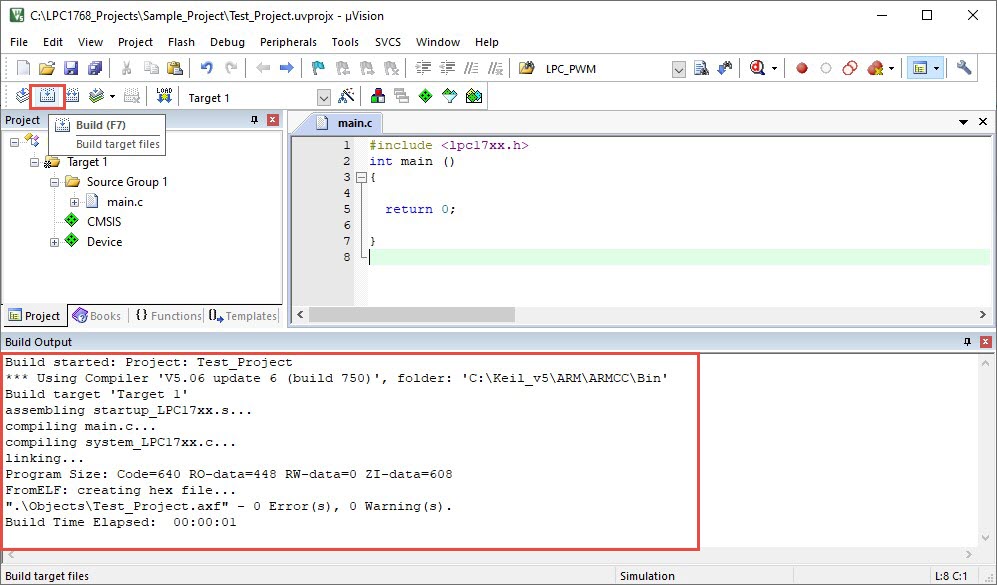
To compile the code, click F7 or go to Project and select Build Project. This will begin compiling the source codes and also generate the HEX file.
Download and Install Flash Magic Tool
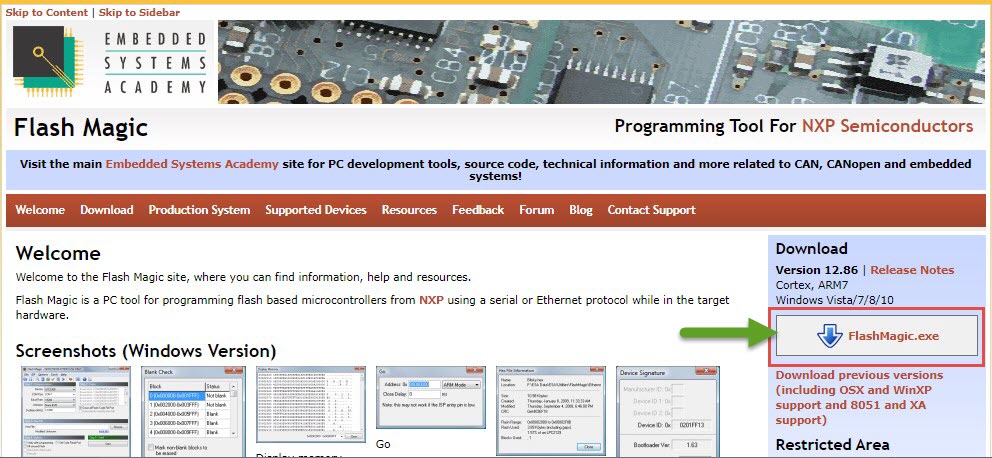
If you want to program your LPC1768 MCU, then you have to use the Flash Magic Tool. Download this tool from this link and install it.
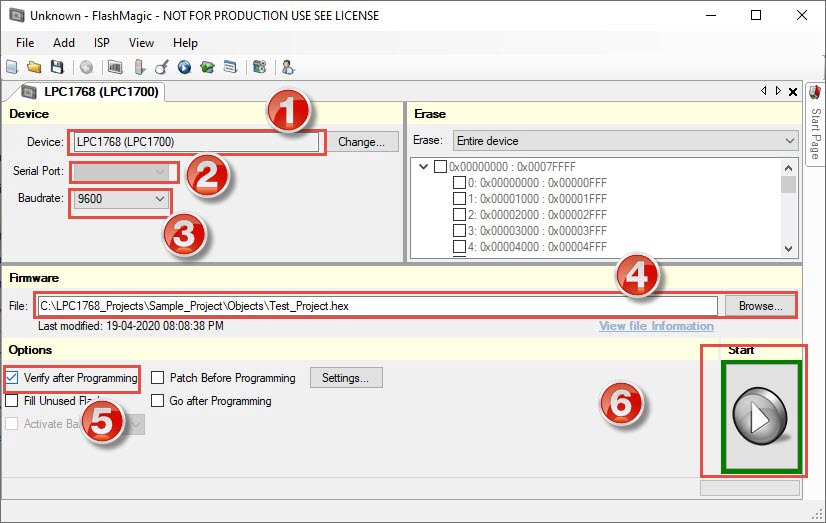
After installing, open the tool. First, select the device as LPC1768. Then, if you have connected the device through an USB Port, then select the correct COM Port. You can get the COM Port number from Device Manager Utility.
Then, set the baud rate as 9600. Now select the HEX file which was created during the build process earlier for the firmware file. Check the “Verify after Programming” option and click on “Start” option to start uploading the program.
Conclusion
In this tutorial, I have shown you how to download and setup Keil MDK for LPC1768 MCU. Also, I have shown you how to download the Software Packs for LPC1768 MCU and also the necessary settings in the Target options. Finally, I have also described how upload the program to LPC1768 MCU using Flash Magic Tool. Comment * Name * Email * Website
Δ
![]()
![]()
![]()

![]()
![]()

