Steps To Clean The Thermal Paste
First, you need to remove the motherboard from the computer cabinet. Use an appropriate screwdriver, and you will need to have a few items in your possession for the process to begin.
What You Need –
Fine Toothpicks Thermal Paste Cleaner Surface Purifier Cotton Buds Lint-free cloth Magnifying Glass
Step 1- Make Working Space
Start by removing all the components from the motherboard. This is to ensure that you have enough space to work on the CPU socket as well as not to damage any surrounding component in the process.
Step 2- Check Your CPU Socket
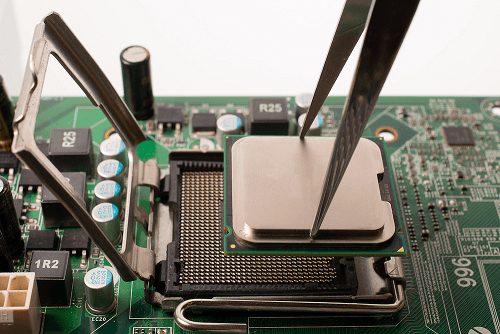
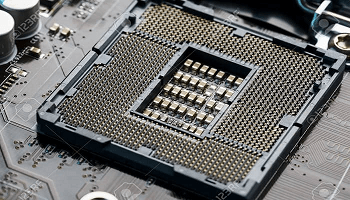
There are two types of CPU sockets available in the market. The first one is the PGA socket, where there are holes for inserting pins. The second one is the LGA socket, where there are pins for the CPU to insert into the slots. PGA sockets take relatively more time in cleaning as there are no pins pointing out. If your motherboard has a PGA socket, skip Step 3.
Step 3- Find Out LGA Socket Pin Direction
The pins on an LGA CPU socket point out at a 45-degree angle. You need to find their direction so that you can clean them properly. If you clean them in the opposite direction, they will bend easily. Take a magnifying glass and examine the pins closely to find them out. You should clean with a cloth or cotton bud not only in the direction of the pins but also from the bottom to the tip.
Step 4- Apply Thermal Paste Cleaner
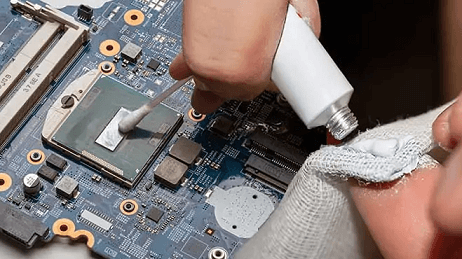
Put a few drops of the thermal paste cleaner directly on the socket where you can see the thermal paste. The cleaner should cover the gaps and holes between the pins. However, do not use it too much.
Step 5- Wait For 5 Minutes
A thermal paste cleaner contains a chemical called emulsifier that grips on the molecules of the thermal paste and pulls them apart from the surface of the processor. For this action to take place smoothly, you have to leave the thermal cleaner for 5 minutes undisturbed.
Step 6- Clean The CPU Socket Carefully
If you are cleaning an LGA CPU socket, start cleaning in the direction of the pins from the bottom to the tip using cotton buds. Make sure you apply very little pressure not to bend or damage the pins. For a PGA CPU socket, starting brushing in a straight line. You will find that the thermal paste is coming off easily now. Keep changing the cotton buds from time to time as soon as paste starts building upon them. For the holes in a PGA socket, use a fine toothpick to pull out the thermal paste from each hole very gently. Use cotton buds to clean up the paste coming out of the holes. While cleaning, you can do the mopping action so that paste does not fill up the holes again. Perform Steps 4-6 twice for proper and thorough cleaning.
Step 7- Clean Up The Excess Cleaner
There could be some cleaning fluid spread out, which needs mopping. The cleaning fluid does not get evaporated as they have thermal paste mixed with them by then. Therefore, you have to dab the top of a PGA socket as well as the holes with cotton buds. For an LGA socket, let the cotton bud or a cloth rest on the pins so that it can absorb the excess fluid naturally. Do not rush or be too hard. It is important for you to know that you cannot clean all the thermal paste completely. Therefore, never attempt perfection as you just need to clean the CPU socket enough.
Step 8- Give It Time To Dry Off
Leave the motherboard to dry off completely for 24 hours. Check back after 24 hours and inspect with a magnifying glass to ensure all surfaces are completely dry. Otherwise, you can give another 24 hours for drying.
Step 9- Clean The Contact Surfaces
It is very important to clean the contact surface before connecting the components back. Put a few drops of surface purifier on a cotton bud. For an LGA socket, move the bud tip in the direction of the pins. For a PGA socket, dab the bud tips into the holes gently.
Step 10- Remove Excess Purifier
Take a dry cotton rub and run it over the pins and holes so that it can absorb any excess purifier from the surface of the sockets. You can use the same process mentioned in Step 7.
Step 11- Again, Give It Time To Dry Off
Leave the socket for at least 24 hours so that the purifier dries off naturally.
Step 12- Connect The Components
It is time to connect all the components back that you disassembled at the very beginning. Take your time, and don’t be in a rush. Once everything is connected, place the motherboard back to the cabinet and screw everything up. Boot the PC and see if there is any issue. If it does not boot, disconnect and reconnect all the components. There could be some thermal paste on the socket left. Use a magnifying glass, and if you can spot it, start over the process once again.
What Is Thermal Paste And What Does It Do?
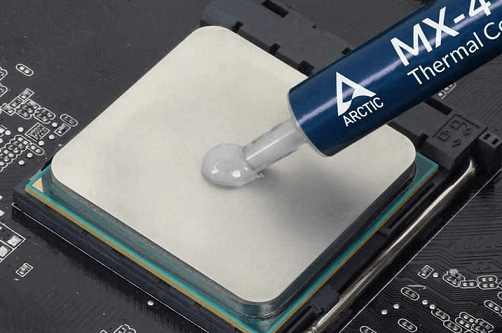
Thermal paste is a material that is applied in between the CPU and the heat sink. It absorbs the heat from the processor and transfers it to the heat sink. The heat sink throws the heat in its surrounding with the help of a fan placed over it. Therefore, the processor always stays cool even when it is used for a long duration. The heat sink is placed directly over the processor. However, there are small grooves and gaps in between them. Through these gaps, air can enter, and air is a bad conductor of heat. That is where the thermal paste comes into the scene. Manufacturers use a thermal paste to fill up the gaps between the heat sink and the processor. This thermal paste also happens to be a good conductor of heat. Hence, the space stays air-tight, and the rate of heat transfer increases with the use of thermal paste.
The Ultimate Thermal Paste Alternative
When you clean the thermal paste off the CPU sockets, you will understand that it is really sticky and messy. The after-cleaning can be a nightmare. That is why there are many who search for an alternative to the thermal paste, and fortunately, there is one such alternative available. The alternative is Innovation Cooling Graphite Thermal Pad. You need to place such a pad in between the socket and the heat sink, just like thermal paste. As a matter of fact, these thermal pads offer better heat conductivity than thermal paste. There is no need for cleaning them as such, and you can even replace them if there is a need. It is about time that manufacturers start using them.
Conclusion
Thermal paste is a necessity for the cooling of the CPU or processor. Cleaning them is equally necessary as it dries off with time. You can be sure that the thermal paste cleaner and the surface purifier are not going to damage any electronic part. Be gentle while cleaning, and do not rush. Give enough time for drying and think about using a cooling thermal pad instead of a thermal paste. Comment * Name * Email * Website
Δ


![]()