We have already seen how a DTMF controlled home appliances system works in the earlier post. Operating conventional wall switches is difficult for physically handicapped or elder people. This project provides the solution to this problem by integrating all the electrical appliances to a control unit that can be operated by an Android application on a device (Android smart phone or Tablet). The proposed system controls the electrical loads based on the data transmitted by the Android device. An Android application should be installed in user’s mobile or tablet to control the electrical loads. Using this Android application user can send the commands to the Bluetooth module to control the electrical loads. Wireless technology used in this project is Bluetooth. It can also be called as “Bluetooth Controlled Electronic Home Appliances” or “Android based Home Automation System” or “Remote Password Operated Electronic Home Appliances Control System”. [Also Read: How To Make an Adjustable Timer ]
Bluetooth Controlled Electronic Home Appliances Circuit Principle
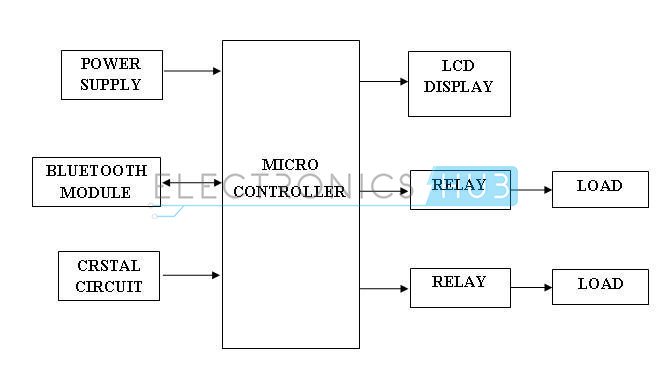
In this project, a Bluetooth module is interfaced to 8051 Microcontroller. This Bluetooth Module receives the commands from the Android application that is installed on the Android device, using wireless communication (Bluetooth Technology). The program which is written to the 8051 microcontroller communicates with Bluetooth module serially to receive the commands. Microcontroller switches the electrical loads automatically based on the commands received from the Bluetooth.
Android Based Home Automation System Circuit Block Diagram
Bluetooth Controlled Electronic Home Appliances Circuit Diagram
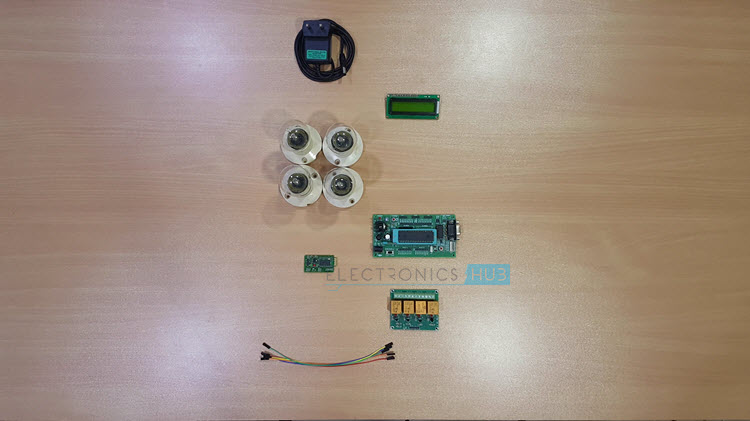
Components Required
Hardware Requirements
8051 Microcontroller (AT89C51) 8051 Development Board 8051 Programmer (Programming Board) Programming Cable 16 × 2 LCD Display 10KΩ Potentiometer Bluetooth Module (HC – 05) 4 – Channel Relay Module Loads (like Light Bulb, Fan, etc.) Power Supply Connecting wires If 8051 Development Board isn’t available, then you might need the following 10µF Electrolytic Capacitor 2 x 10KΩ Resistors (1/4 Watt) 2 x 33pF Ceramic Disc Capacitors 0592 MHz Quartz Crystal Push Button 1KΩ x 8 Resistor Pack If Relay Module isn’t available, then you can build the 1 – channel relay circuit (for 1 load) using the following 5V or 12V Relay BC547 NPN Transistor 1N4007 PN Junction Diode 1 KΩ Resistor (1/4 Watt)
Software Requirements
Keil µVision IDE Willar Software Proteus (for Circuit Diagram and Simulation) Android Application installed on Android Device
Android Based Home Automation System Circuit Design
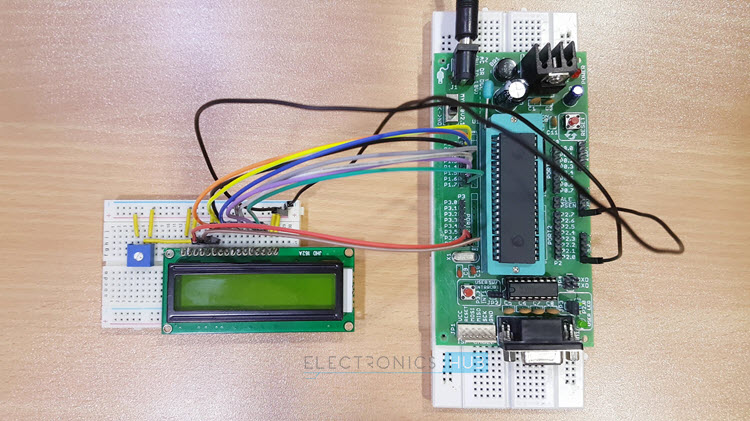
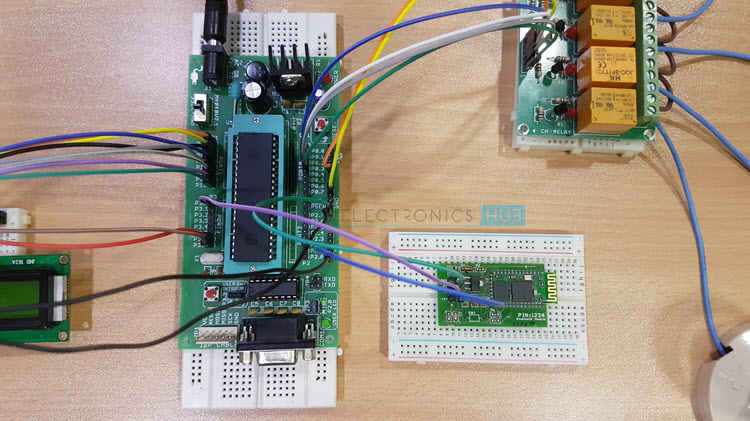
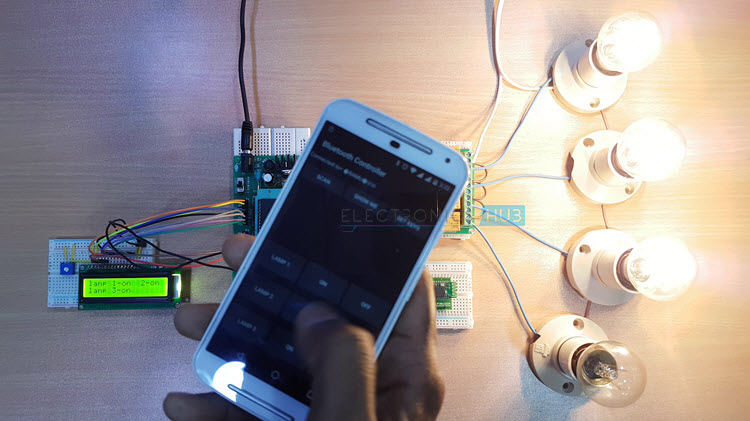
This project consists of a microcontroller, 16 x 2 alphanumeric LCD, 4 – Channel Relay Module, Loads (Light Bulbs are used in the demonstration) and Bluetooth Module. Here, AT89C51 Microcontroller is used. It is an 8 – bit microcontroller and it requires supply voltage of 5V DC. Use 7805 power supply circuit to provide 5V DC to the microcontroller. We can use 9V DC battery or 12V, 1A adapter to provide the supply to the circuit. For the above circuit additionally you need to connect reset circuit and crystal circuit to the controller to work properly. You can ignore these connections (Power Supply Regulator, Crystal Circuit and Reset Circuit) if you are using an 8051 Development Board. In the above circuit, the LCD display is used to indicate the status of electrical loads and also used to display received data from Bluetooth (Optional Feature). Here, the LCD Display is interfaced to the PORT1 of the microcontroller in 8 – bit mode i.e. the data pins of the LCD are connected to PORT1. The three control pins of the LCD i.e. RS, RW and EN are connected to P3.6, GND and P3.7 pins respectively. Also, a 10KΩ POT is connected to the Contrast Adjust pin of the LCD to control the contrast of the display. The TX and RX Pins of the Bluetooth Module are connected to the RXD and TXD pins (P3.0 and P3.1) of the microcontroller. VCC pin (Pin 40) is connected to the +5V and GND pin (Pin 20) is connected to ground. The Microcontroller communicates with Bluetooth Module using serial communication (UART protocol). Use a baud rate of 9600 to communicate with Bluetooth. If you want to change the Bluetooth name and password then you need to use Bluetooth AT commands. Below are the few Bluetooth AT commands:
AT — Responds OK. (Used to test the Bluetooth module) AT+RESET — Responds OK. (Used to reset the module) AT+NAME? — Responds with the module name. AT+NAME =
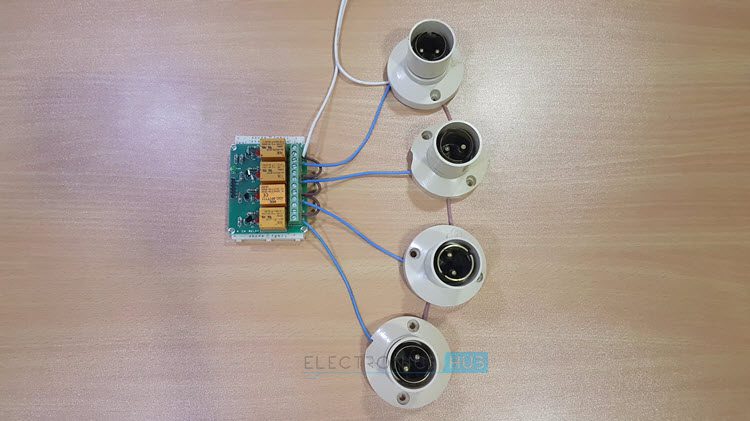
To know about all the Bluetooth AT commands refer HC-03/05 Embedded Bluetooth Serial Communication Module AT command set. Electrical loads (like Lamp and DC motor) are connected to the P0.0 to P0.3 Pins through the 4 – Channel Relay Module. Here, relays are used to switch AC loads using small DC voltages. NPN transistors are used to drive the relays. If you are using a relay module, then transistor and other important components to drive the relay are already embedded on the module itself. NOTE: The Circuit Diagram shows connections of only one load. But the connections to the other loads can also be made in a similar fashion.
Algorithm for Bluetooth Controlled Electronic Home Appliances
Android based Home Automation System Circuit Simulation Video
Watch the following output video of home automation system using android applications.
DOWNLOAD PROJECT CODE
How Bluetooth Controlled Electronic Home Appliances Circuit Works?
Bluetooth Controlled Electronic Home Appliances Project Output Video
Bluetooth Controlled Electronic Home Appliances Project Applications
This project is used to control the various electrical appliances from the remote area. Using this project we can control all the loads using a single remote and a control unit.
Limitations of the Circuit
In this project the distance between control unit and android device is limited.
Comment * Name * Email * Website
Δ
![]()
![]()
![]()


![]()
![]()

